
Ceramic dies
Andy's solution to the never-ending die problem
Extruders are brilliant bits of kit - if only dies were available in the shapes I actually want.
Although commercial dies are available they can be expensive and only approximately what you actually want. There are several commonly used methods of making your own dies. Solid dies can simply be cut out of perspex or even plywood, but hollow dies present a different problem.
My friend Andy (from Woodbridge Art Club) has come up with an interesting variation for those potters who don't want to learn new trades.
Here is Andy's guide to making ceramic hollow dies.
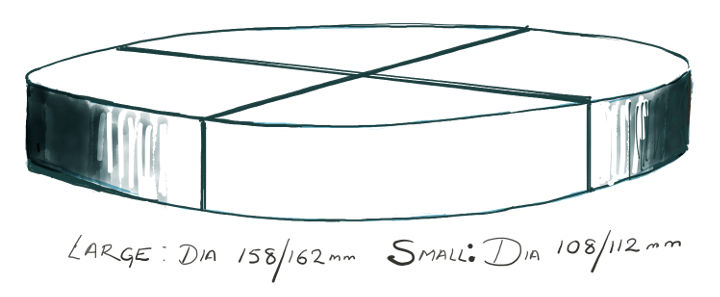
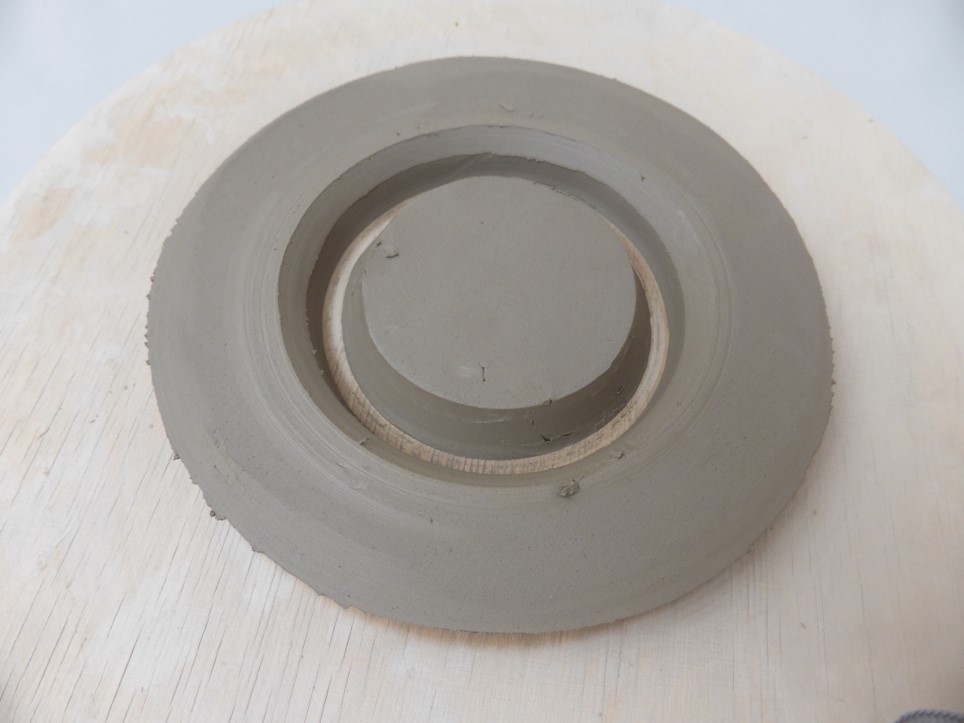
1. Cut out a circle of clay approx 15mm thick and dia. 158-162mm to allow for shrinkage.
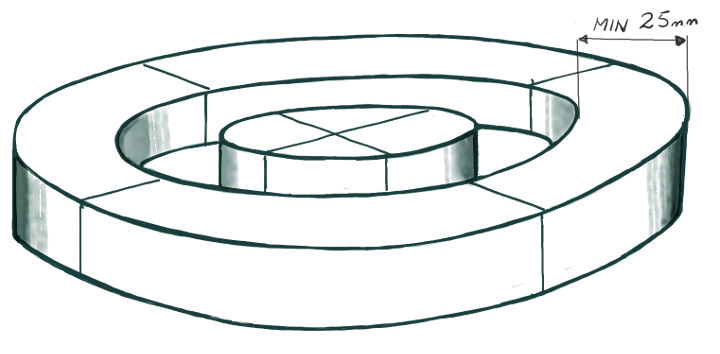
2. Mark the diagonals and then cut out the circle of clay to the required diameter and wall thickness of the tube.
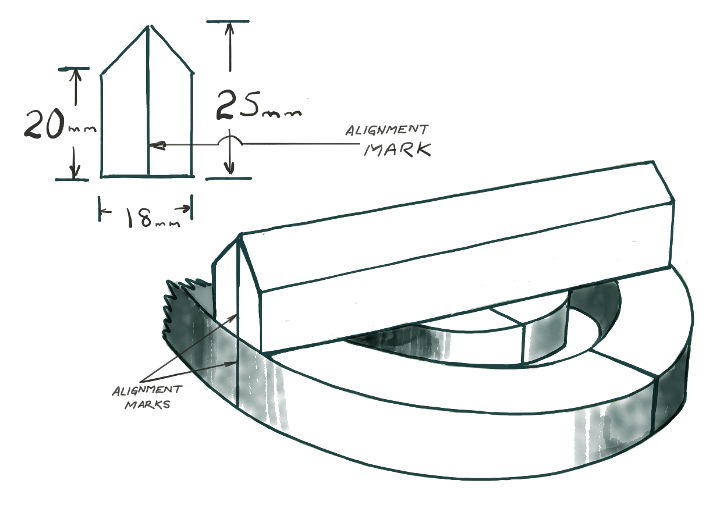
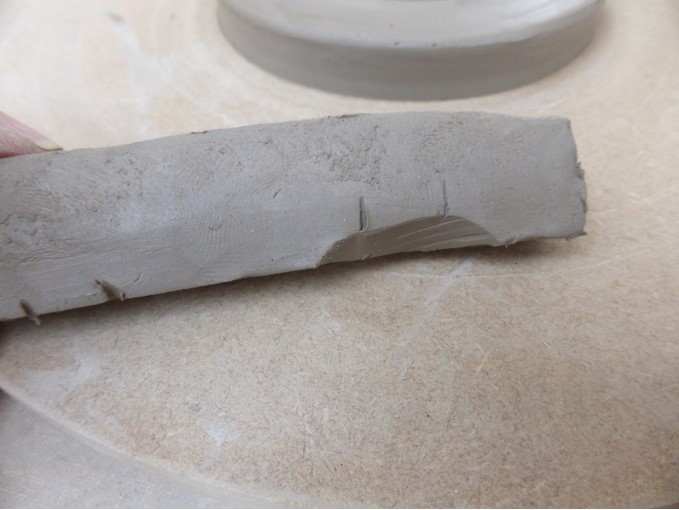
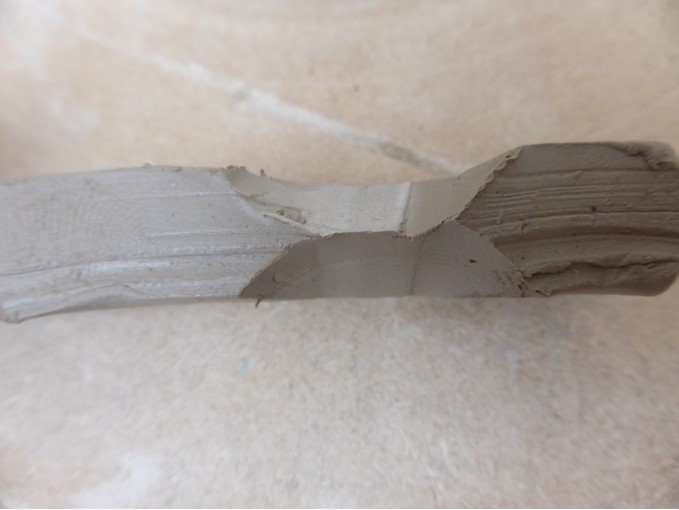
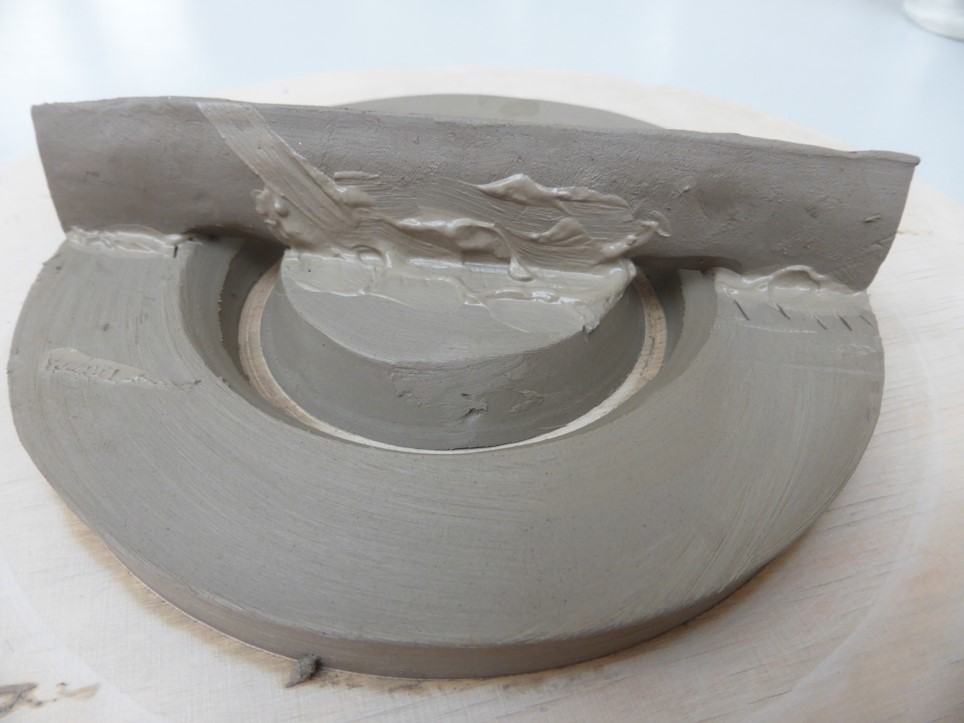
3. Make a bridge to span the die and mark the centre line on the ends of the bridge to aid alignment. Use a good slip to join the bridge to the base.
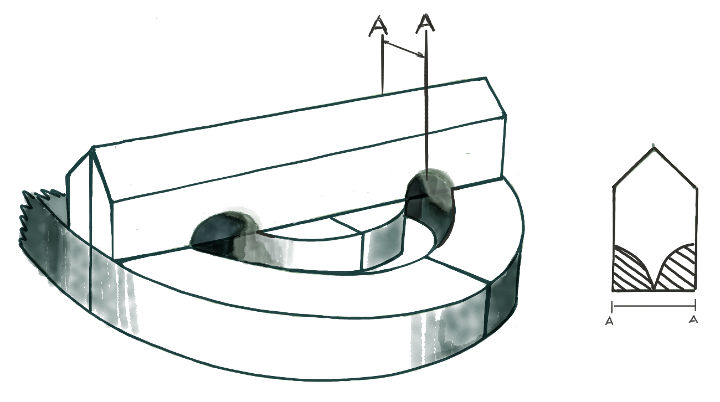
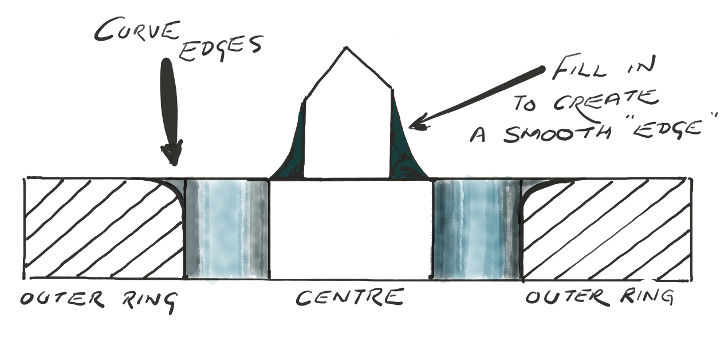
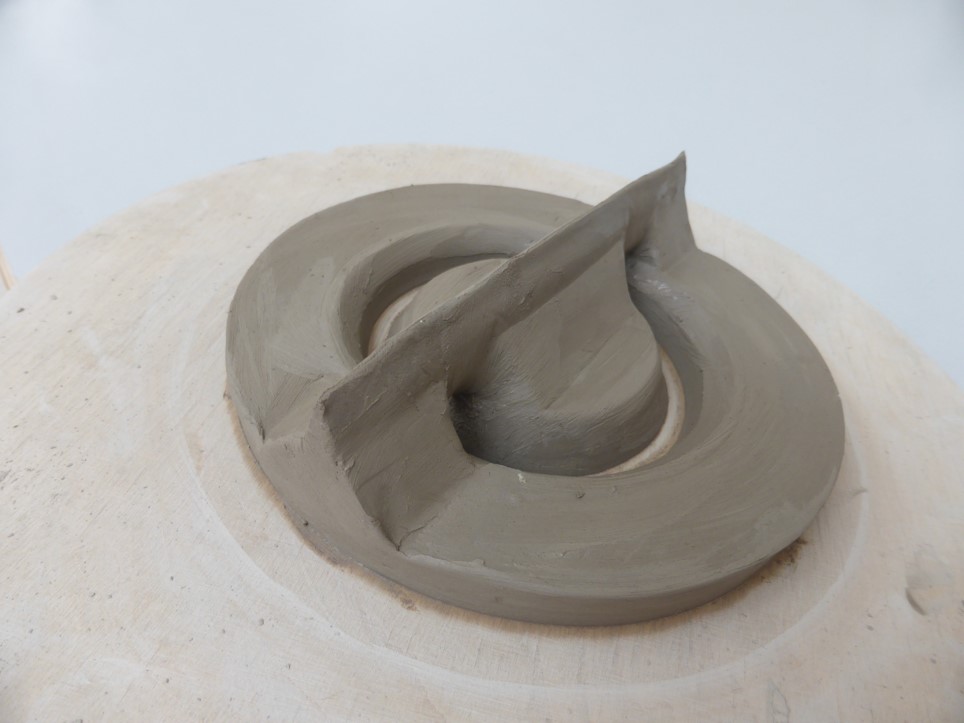
4. To allow a better flow of the clay cut away and smooth the edges as shown.
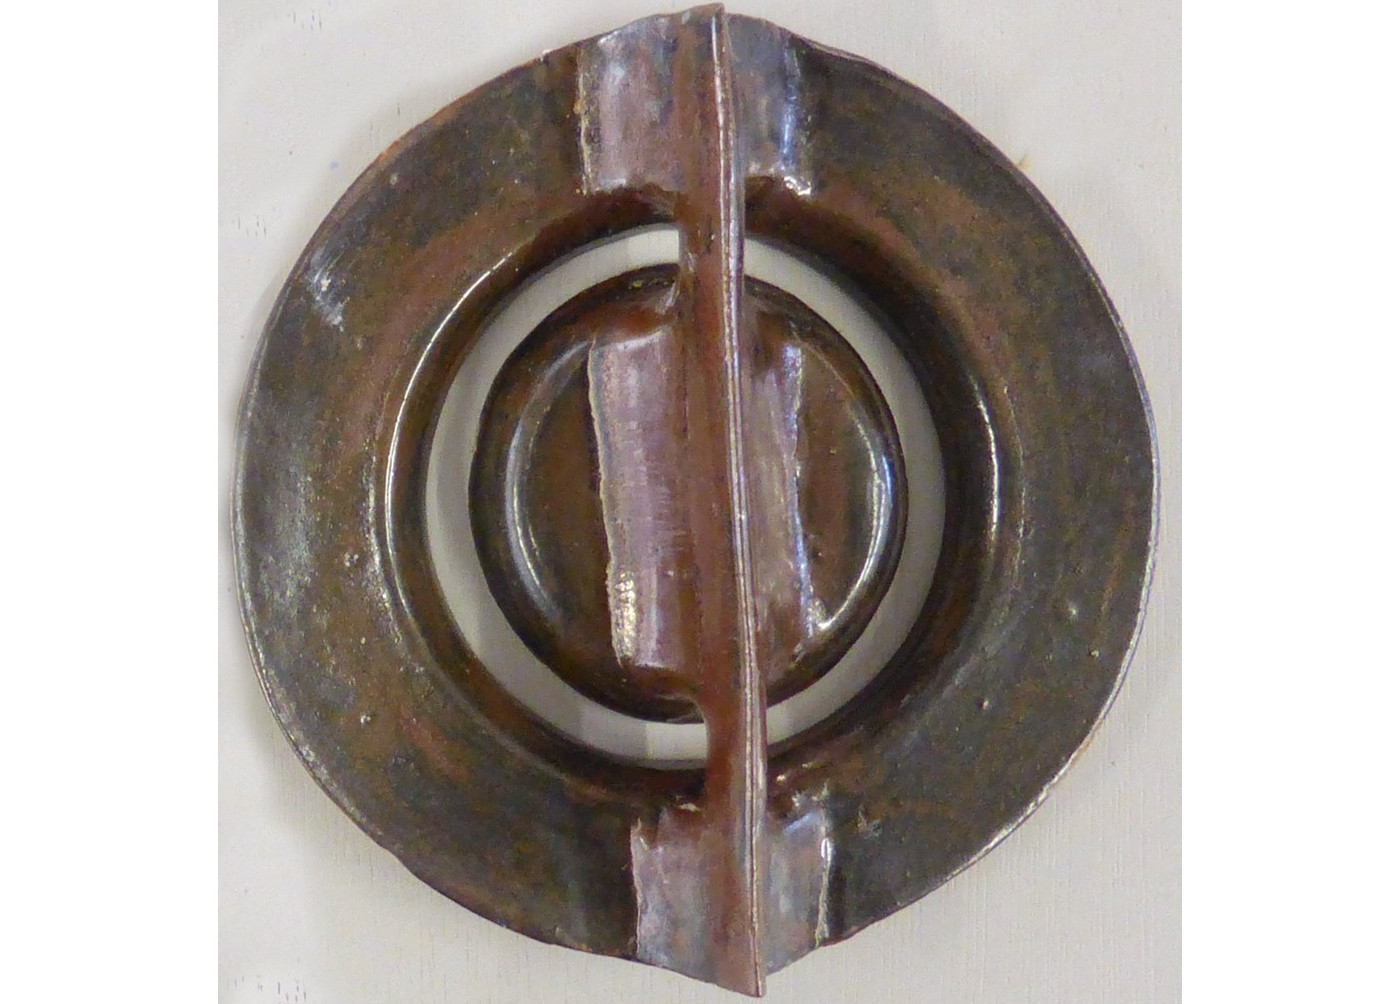
5. Fire and glaze. Glaze is not essential but it helps considerably when washing the die after use. This design is for a simple tube but other shapes can be made including triangles, hexagons, oblongs, squares etc. The secret to getting good results is to build the die accurately and not to rush it. Have fun.
Here are some photos of the build - click a picture for more detail.
Cut main parts

Side view

Bridge blank

Mark for cut-outs
Relief cut out
Second notch
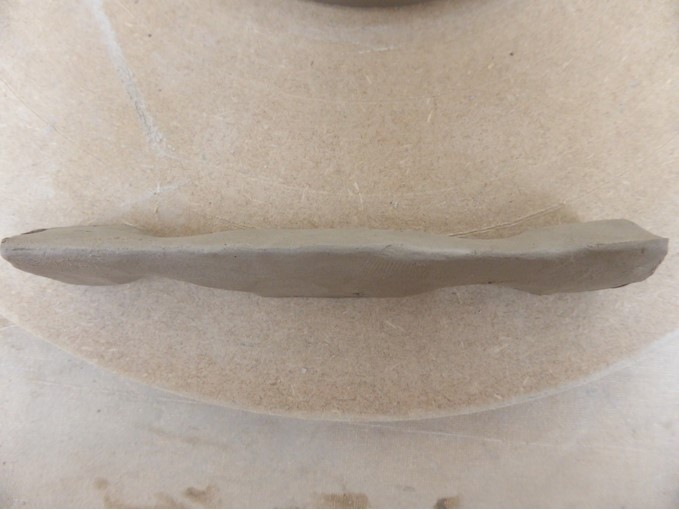
Bridge
Mount bridge
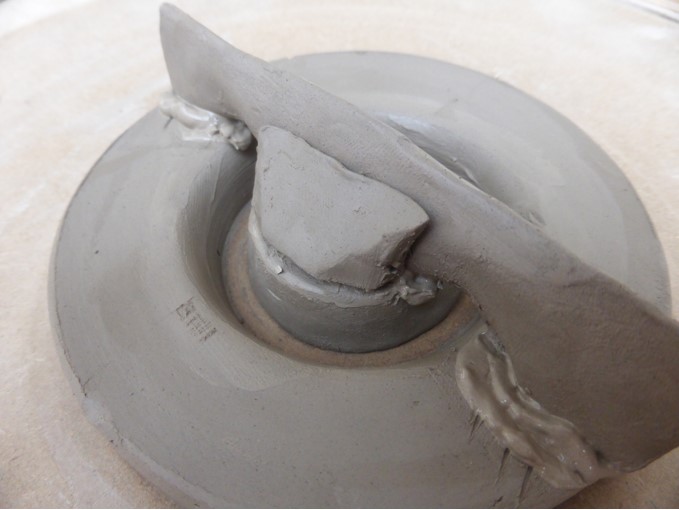
Reinforce bridge
Bridge mounted

Smooth the edges
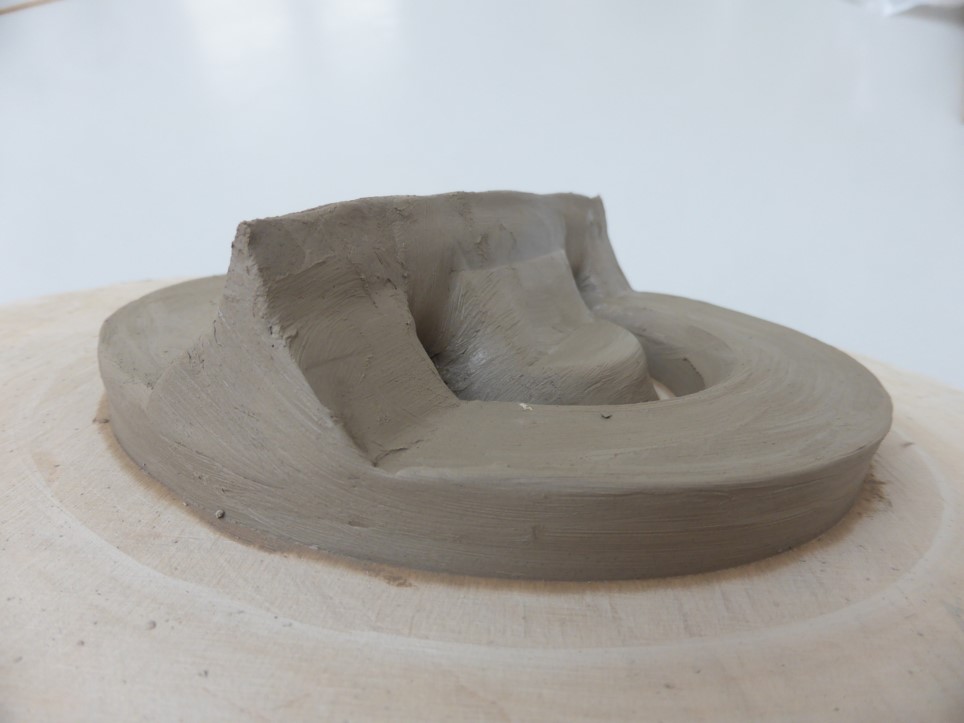
Ready to fire
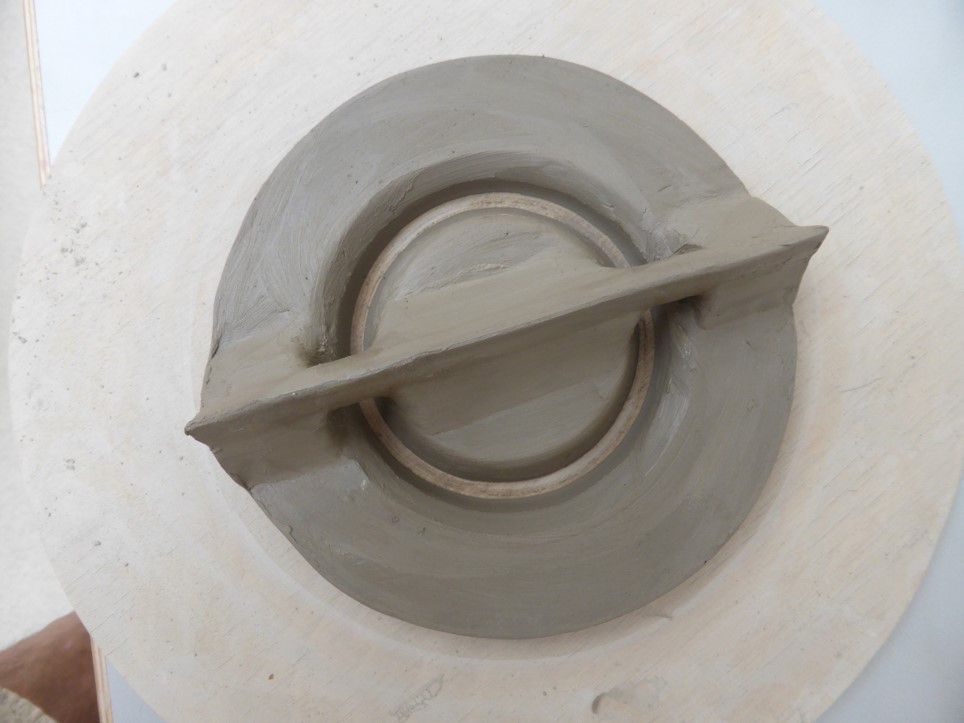
Ready to fire top view

Finished samples
Another example
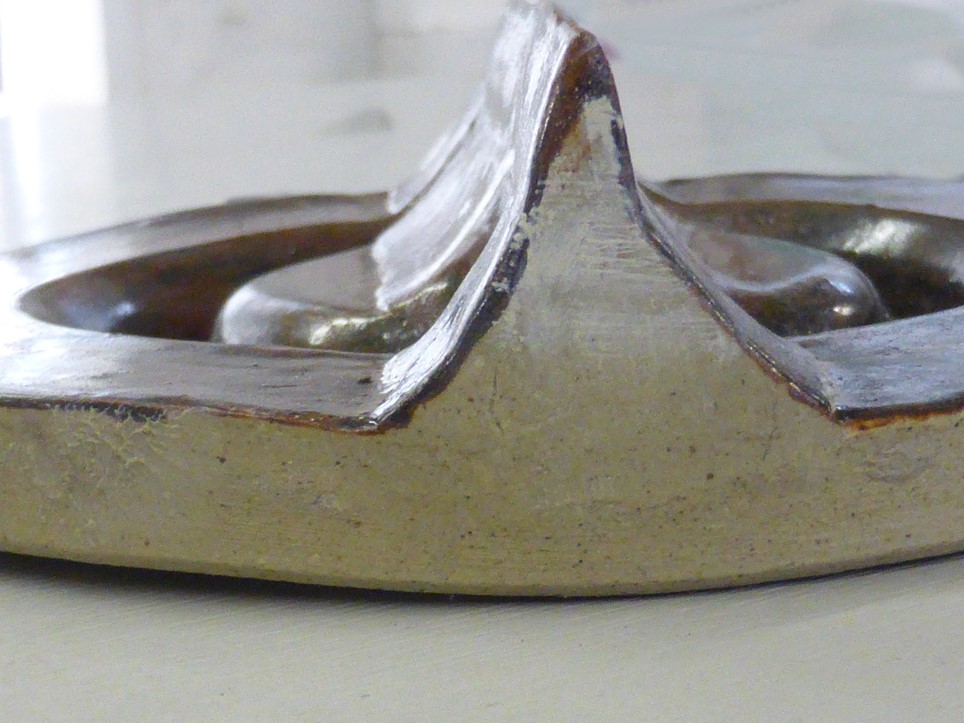
Example side view

100mm and 150mm dies