Batt system
A simple home made system
Throwing batts are a great idea and are used by many potters.
The obvious method and traditional appears to be to use a round batt pegged to your wheel-head or just stuck down on a clay bed. However there are a couple of downsides to that option.
- Round batts are quite hard to make accurately, which tends to make them expensive.
- Round shapes don't stack together well on your ware shelf.
Our preferred option for cup or small bowl throwing is to use a tile head on the wheel. This is a disc (again pegged or bedded on clay on the wheelhead) with an accurately cut square recess. This takes simple square batts, which are easy to produce, hence economical, and which pack well on your ware shelf.
Home made version
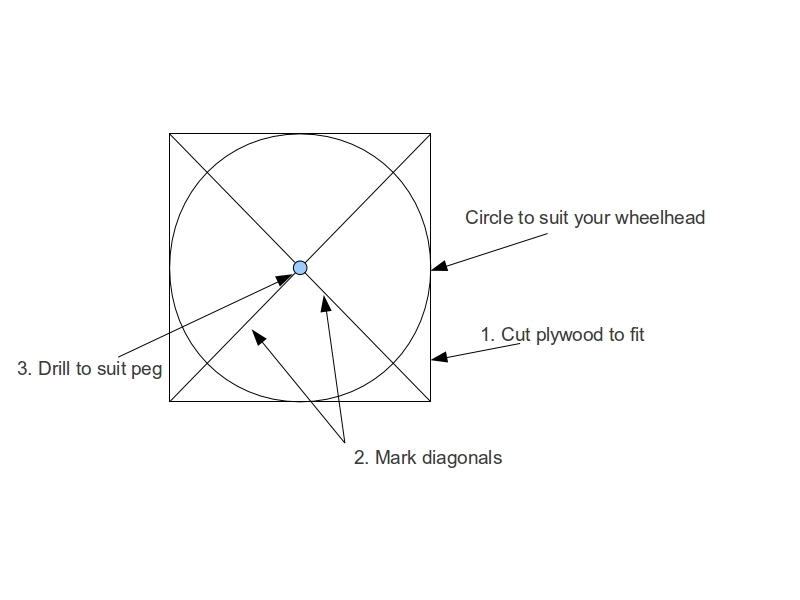
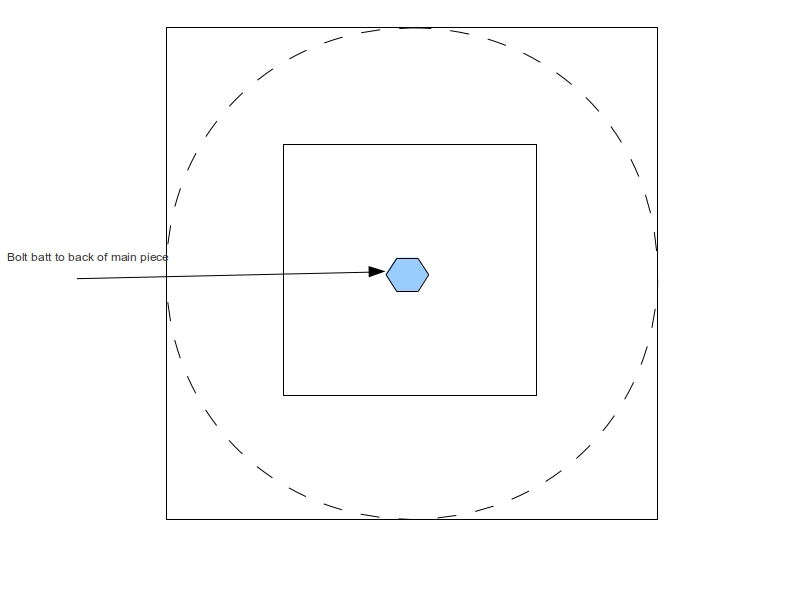
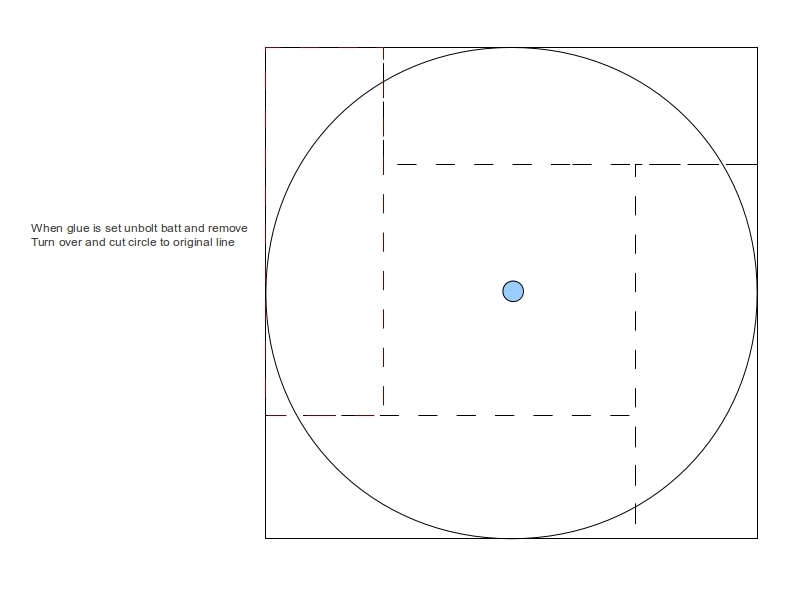
Take a square of birch ply slightly larger than your wheelhead. Draw lines across the diagonals to locate the centre. Use a pair of compasses or a trammel to draw a circle on the back of the tile head to match your wheel head. If you have a wheel with a centre peg drill a centre hole and a drive hole to suit. Cut a square batt of your chosen size. Mark the centre and drill to suit. Bolt the two together with a close-fitting bolt, with the batt on the non-marked (front) face.
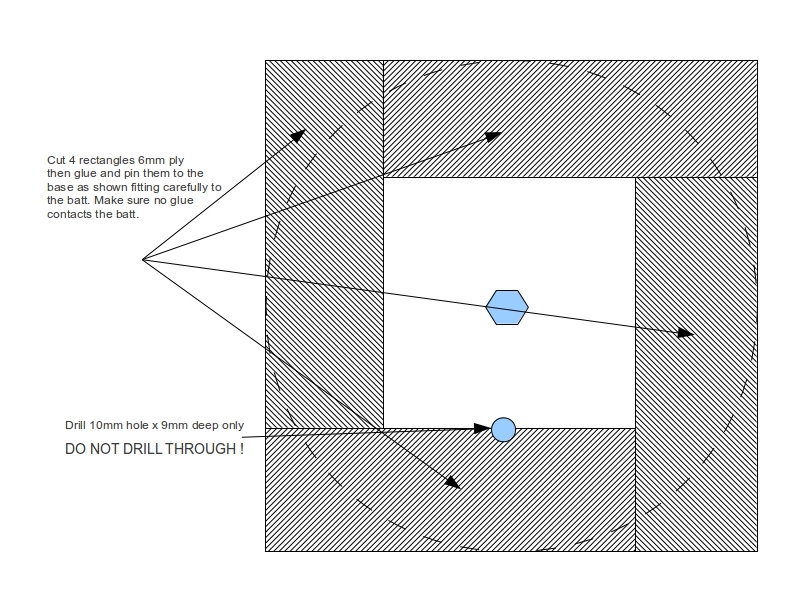
Cut 4 rectangular pieces. Line up the end of one rectangle with the corner of the batt and glue and pin it the the main board. Fasten the other 3 rectangles to the board flush to the edges of the batt. Drill a SHALLOW hole in the middle of one edge of one of the rectangles.
When the glue is set remove the bolted batt, turn the assembly over and cut round the marked circle. It is a good idea to protect the finished job with 3 or 4 coats of varnish, rubbing down between coats.
Stage 1

Stage 2
Stage 3
Stage 4
Stage 5